
When we left off last time, poor Jeremy (as I’ve decided to call him) had eyes and a nose, but no mouth. What a pickle! I’m going to call Cheri’s little guy Vince, though I’m sure she would have some other name for him (that is, if she weren’t out camping this weekend, in what I’m calling a gentle, soaking rain and she’s probably thinking of as a miserable drizzle). Anyway, Jeremy’s (and Vince’s) mouth parts . . .

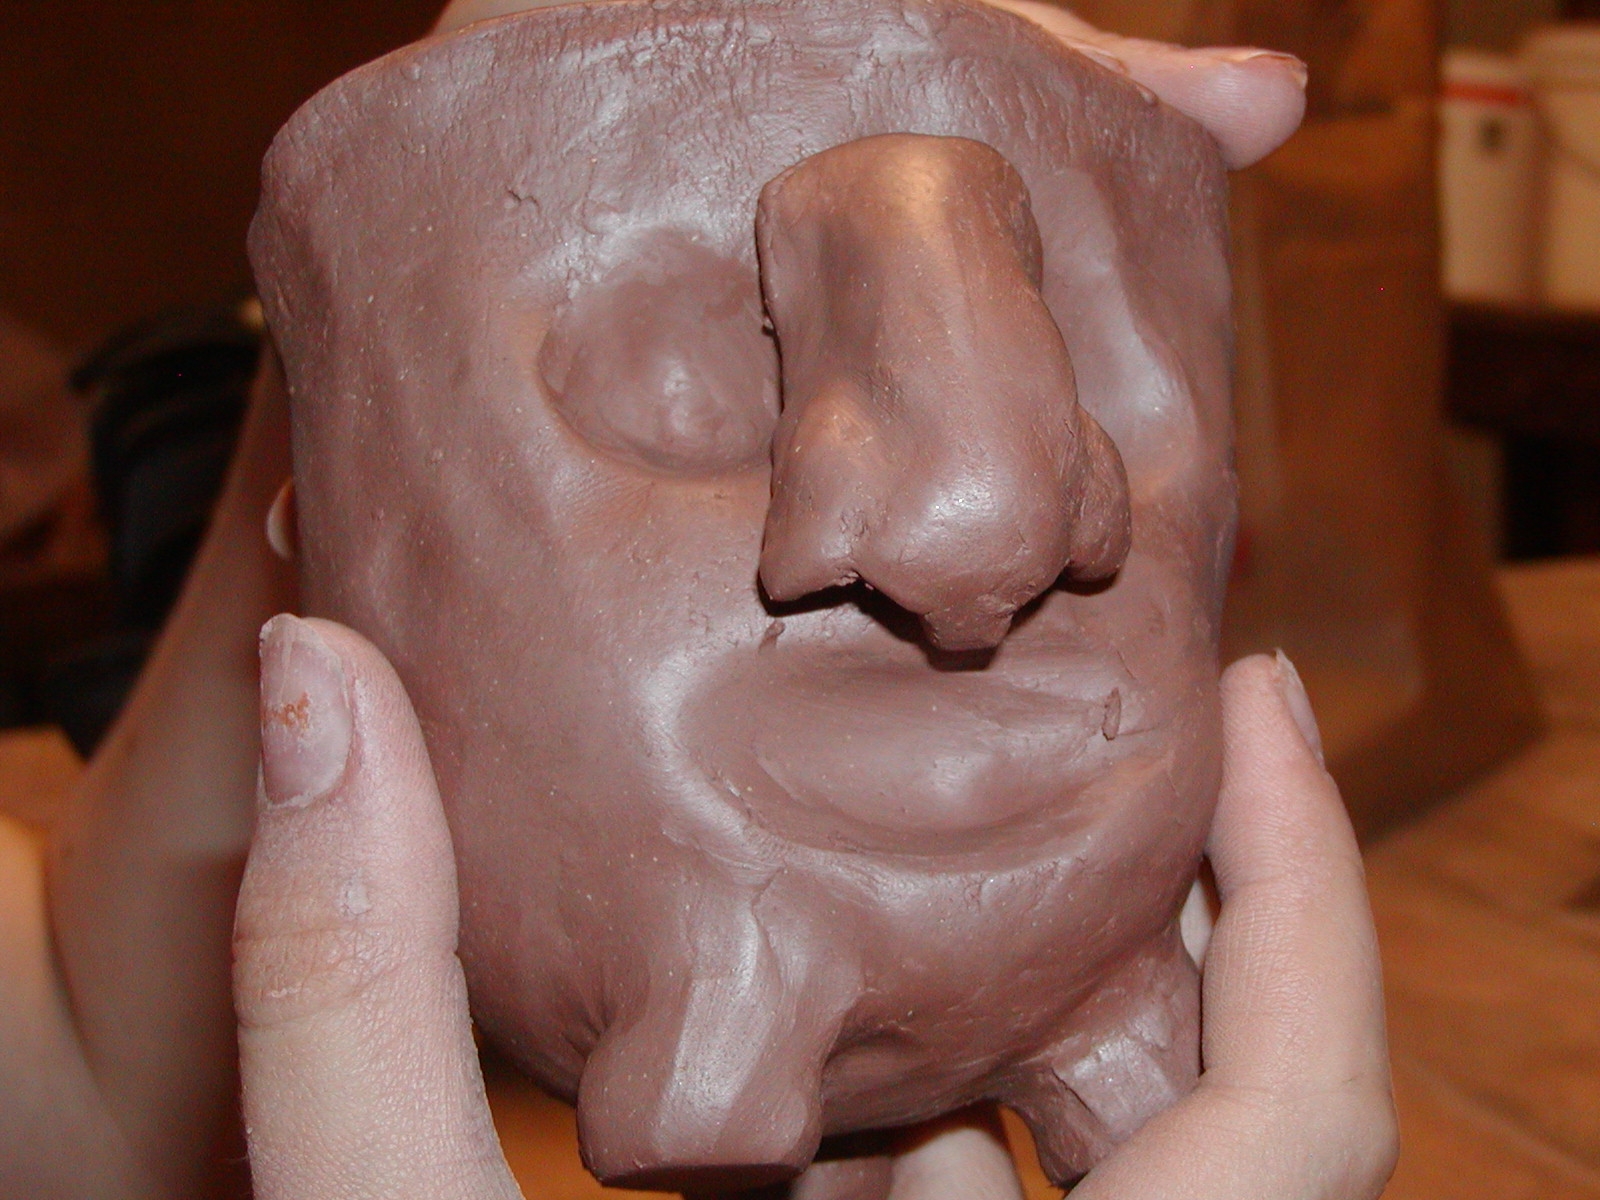
This is the upper lip. You can’t tell from the photo, but it’s thicker along the bottom edge. It fits in under the tip of the nose and has to be smoothed down inside the nostrils.

After scoring and dampening the area, I applied the lip and smoothed in all the edges. Note the lines on the lower part of the lip. I didn’t mean to put them there, but I’m going to leave them. After applying the upper lip, I repeated the process for the lower lip. I like to put on the upper lip first because it’s easier to work out placement, but the corners of the upper lip need to overlap those of the lower lip slightly, so I tuck the lower lip corners in under those of the upper lip. That’s if you’re going for quasi-realism. If it’s cartoony you’re after, it doesn’t matter about the corners.

As you remember, Cheri is giving Vince a different sort of mouth. Look back at Part 1 to see how she prepared her face to receive its features if you don’t remember. The mouth is all caved in like a real mouth, and she’s going to give Vince a set of dentures next. Sorry about the fuzzy photos–I was having trouble figuring out the camera’s macro feature.

As you can see, she’s made him a little rounded gum and is poking teeth into the slots. If you want to get fancy, you can use white clay for the teeth–only make sure it fires to the same temperature as your main clay. Just dip the root in a drop of water before inserting it, then pinch the gum around it firmly. And here is the finished set of chompers:

She’s just slipped them in so you can see, but she’ll be scoring and dampening, etc., of course. Doesn’t he look delightfully goofy?

Here he is with upper and lower lips in place, and he’s almost ready to dry. Meanwhile, Jeremy still needs something to stand on. I think I’ll give him feet. Real feet–well, kind of real . . .
Get two equal-sized blobs of clay and round them out into kind of a cucumber shape. You’re going to make pinch-pot feet and ankles. It’s just like making any pinch pot except you’ll be squishing it into a bootie shape and you’ll leave the arches fairly thick and the toes solid.

For my purposes, I want the walls of my pinch-pot feet to stay pretty thick to provide support. At this point, they’re as thin as I’m going to make them. The next step is to gently squoosh (that’s a technical term) the clay into a foot shape. Take off your shoes and look at your feet if you need a reference. 😉

Forming both feet at the same time will help you in getting them the same size. Once you’ve satisfied yourself with their shape, you can divide the toes from one another with a knife or needle tool or whatever you have. You can do four or five toes–cartoon characters usually have four, but I did five anyhow.

I’m using a wooden modeling tool (you could sharpen a Popsicle stick if you haven’t got anything else) to start rounding off his toes. I finished them by rolling them between my fingers. Just do whatever it takes to get nicely rounded toes. Again, do both feet before going on to the next step.

This high-tech tool is the lid to a Bic pen. It’s just right for making these tiny toe-nails and it works fine for making the toe wrinkles as well. You can go as far as you’d like to with making the feet realistic.

Jeremy’s feet are all ready to go now. Let’s try them on:

Oops! Way too tall! He looks like a naked basketball player. All I want him to do is sit there and hold my salsa. Let’s cut them off a bit . . .

There–loads better. Once you’re satisfied with the feet, mark their location, score, moisten and attach securely.

I felt almost guilty doing this to Jeremy’s cute little feet, but if you don’t poke a hole to give a hollow place access to let off steam, the expanding air and moisture during firing will make a hole of its own–usually somewhat violently. Sign your name or mark to the bottom of his foot (the only place that won’t be glazed) and cover him with plastic for a day or two to allow the various pieces you’ve joined together to equalize in moisture content and get used to hanging out together.

Cheri has given Vince a pair of eyebrows, which adds greatly to his personality, as does her decision to forgo a lower eyelid.

And here’s one more shot of Jeremy, in a classic 3/4 portraiture pose. Once Vince and Jeremy are done being fired and glazed, I’ll post another shot of them. Meanwhile, here are a couple of different pinch pot characters to give you some inspiration.


God bless,
Cindy


Recent Comments